

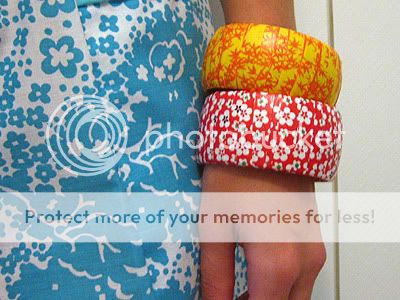
[color=red]Remember a few summers ago when we all went out and bought those big plastic bangle bracelets in bright 80s colors? Ah… hindsight. However, I love a good, wide bangle, and was determined to give even my most garish ones another chance at a fashionable life. Here's how this works:
1) You'll need a sheet of patterned paper (I used Japanese origami paper, which can generally be found in arts & crafts shops), some basic white glue (or Modpodge) and a clean paintbrush.
2) Cut the paper into small strips, about 1cm wide and long enough to wrap around the width of the bracelet. You're going to need to have enough to cover the entire exterior of the bracelet, which is probably around 30 strips.
3) Brush a light layer of glue on the inside and outside of the paper and position on bracelet. Continue this and work your way around the exterior of the bracelet, slightly overlapping each piece. Coat the outside with more layers of glue to help the paper stick together seamlessly (you don't want to overdue it with the glue, but it will dry clear so you don't need to keep it too minimal either).
4) You'll probably want to do half the bracelet, then set it upright on its non-gluey end to dry before finishing the other half.
5) I gave mine another good coat of Modpodge Matte later to seal it so I wouldn't have to panic too much if I'm wearing the bracelets during one of Singapore's regular rainstorms. However, they're still not exactly rain- and spill-proof, so perhaps a spray of acrylic sealer would work better?
6) This seriously takes about 20 minutes, tops.
I did this and these bangles are wonderful fashion accesories!!!!!!!!!!!!!!!!!!!!!!^________^ <3