
Here is an exposure meter. See the big dot in the middle?
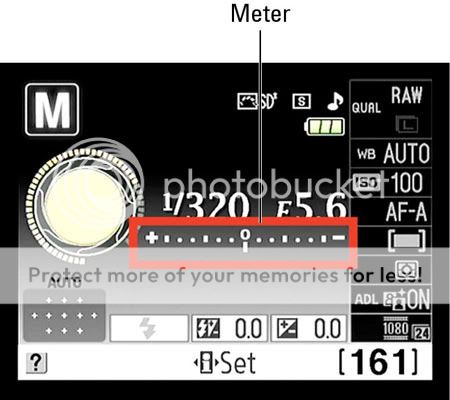
Notice the...
+ . . . . . 0 . . . . . .-
The "0" is the center, proper exposed point on the exposure meter. When the "l" is under the "0" it means it is properly exposed. I call it the "happy place". To do this, spin the command dial till it is at the correct setting. By doing this you are changing your shutter speed. Shutter speed is how fast the camera takes the photo. The higher the shutter speed (in the above diagram - 1/320) the faster it will shoot, but it will also make images more darker, or lighter. You just need to watch the exposure meter while spinning the dial.
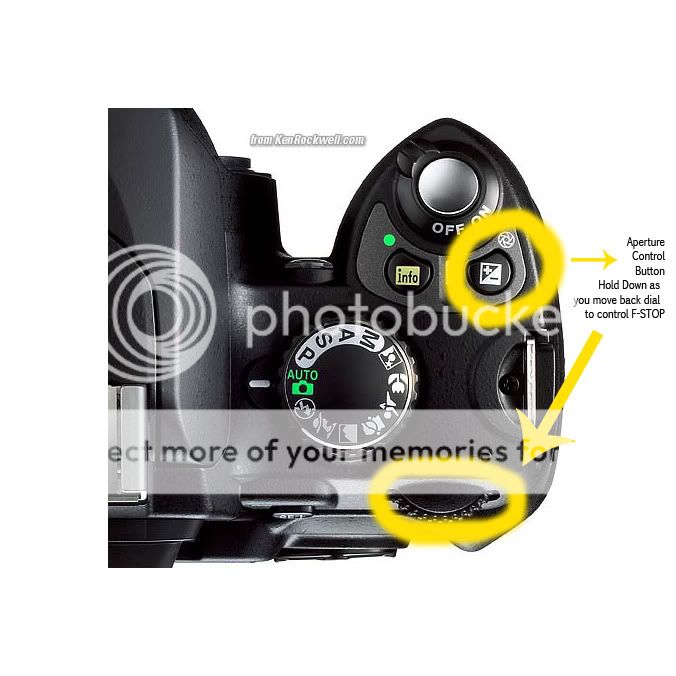
The aperture will control depth of field, and flash. For now we will ignore and not use flash. But as for aperture setting (f-number - as seen as F 5.6 in the first diagram) you can make the aperture more narrow, or more wide. For now we will shoot at the widest aperture setting. (lowest f-number your camera will go) This next diagram will show you how to control your aperture.
For now we will leave the ISO on auto mode and save that for the advanced lesson.
For Canon users (such as myself), what is written above is essentially the same thing for Canon. Here is your diagram.