

I found this site that had this awesome step by step guide on how to make a flogger. So I thought I'd post it here so A)You guys can check it out. And B) I have it somewhere that I know will never be deleted. I don't know about you guys but I'd most of the time rather copy and paste something to my LJ than just copying the link. Cuz what if they close the site down? Then you've lost what you've wanted to save.
Making Your Own Flogger
You will need:
leather - the heavier the leather, the more it stings. Suede is a good choice for your first flogger. The sensations with suede can range from sensual to stingy.
wooden dowel - This will be the handle of your flogger. Choose something smaller than you want the handle to be, as you will be wrapping thick leather around it.
leather glue - You will find this in the leather shop. You won't be able to find anything better to glue your leather with.
metal ruler - you will use this as a guide for cutting the leather, and for measuring
carpet knife or rotary blade - to slice the leather of course!
cutting surface - I bought a thick plastic cutting pad at Walmart. They keep them right where they keep the rotary blades, in the fabric section. The harder and smoother your cutting surface, the more accurate your cuts will be.
Let's Start!
First, choose a piece of leather carefully. Look at both sides and check for flaws. You don't want to get home and find there is a hole right in the middle of the hide. Often you will pay less for a hide with flaws, so you might be able to find a cheaper piece of leather that has a few minor flaws towards the edges.
See figure 1. Decide which side of the leather you would like to have facing out on the handle of your flogger. Put that side facing down, and lay the leather out on a flat surface (we won't be cutting yet). Decide how long you want your handle to be, and how long you want the tails to be. The rectangle that you are going to cut into the leather will have a length equal to the length of the handle plus the length of the tails. My flogger has a handle length of approx. 10 inches, and tails approx. 20 inches. This means, the length of my rectangle was 30 inches. Next, you will have to figure out the width of your rectangle. To do this, you need to decide how many tails you want your flogger to have. The less tails, the more sting. The more tails, the more thud. My flogger has approx. 30 tails, and it packs a lot of thud. I would suggest making each tail about a third of an inch wide, but this is mainly preference. Thinner tails are much more difficult to cut.
Take the length of tails plus the length of the handle for the length of your rectangle, and take the amount of tails you want multiplied by the individual width of each tail for the width of your rectangle. You should add about an inch to the length, and to the width to make slightly more room for the handle. Now take the length and width, and draw your rectangle onto your leather. Measure carefully and use your ruler.
See figure 2. Now you will need to mark the lines for cutting the tails. The rectangle will be divided into two parts, the handle side, and the tail side. The handle side will need to be the length of your handle, plus an inch. Measure this out down the length side of the rectangle, and make a line across the middle of the rectangle. This line appears red in figure 2. Your tails will be cut from this line towards the right side of the rectangle.
See figure 3. Lay your ruler along the line you just made, the red one in figure 2. Start measuring the width of your tails out from the left, making a tick mark where the beginning of each new tail will be. If they are going to be a third of an inch wide, there will be a tick mark every third of an inch. Now lay your ruler along the right end of the rectangle and do the same as you did along the red line. See figure 3.
Next you will use these tick marks as a guide for your ruler. Line up the ruler with the first tick mark on each line, and draw a line to connect the two. See figure 4.
To begin cutting, you may want to cut the tails out before the rectangle. It can be hard to cut the tails near the edges when there is little leather between the knife and the edge of the leather.
First, lay the part of leather that you will be cutting across the cutting pad that you've bought. Start with one side of the tails. Lay your ruler alongside the line you have made and press it down very firmly with your hand. WARNING: be sure your fingers are not in the way. Use your rotary cutter or carpet knife to cut along the line, using the ruler as a guide. Start at the line that is red in the picture above, and cut down towards the end of the rectangle. Do not cut into the handle side of the rectangle.
Now use your ruler as a guide again and cut out the rectangle.
Now that everything has been cut, you need to add the handle. Cut the wooden dowel that you've bought to the length of handle you wanted. Before we go spreading glue all over the place, you may want to practice the placement of the handle, to make sure everything rolls up correctly. Lay the handle lengthwise in the handle side of your leather rectangle. Now grip the edge of the leather and the dowel, and roll the handle up inside the leather. See figure 5. You will roll your dowel inside of the leather, in the direction of the arrow. When you have a good idea of how this is going to work, move the dowel aside and spread your leather glue over the entire handle side of the rectangle. Lay the dowel lengthwise again and roll it up in the leather.
Be careful with the glue. Remember that as you roll, the glue will squish out flat under the leather, often squeezing it out past the edges. Any glue that gets on the leather will leave a sort of dark stain, so make sure you don't get any on the side of the leather that is going to show.
Roll the handle all the way to the top of the rectangle. This means the leather will roll up into several layers around the handle. When you reach the edge, press the edge down tight all along the handle. Leave your flogger to dry. Read the leather glue instructions for an idea on how long this should take, but I would suggest a minimum of an hour or two.
When the glue is dried, your flogger is complete. I like to finish up with some fancy nails, first to secure the leather even further to the handle, and second because it looks good.
Here is a picture of the finished product!
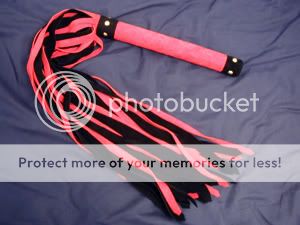
Happy Flogging!!!! ^_^
Later,
Lexy
PS: *whispers* You can use smaller wooden dowels and pieces of leather with a silver key ring and make a keychain. I think it'll be fun to make them and then sell them on ebay or what not. wink
